About twenty years ago, I was hunting through one of my local charity shops when I came across a large biscuit tin filled to the brim with old buttons. It was then that a love affair was born; for the next couple of years I obsessively collected vintage buttons. As well as visiting charity shops, I regularly went to local antique fairs and markets, and even joined the British Button Society! I was amazed at the beauty of some of the buttons I found, and by the creativity that had gone into their design and manufacture. For example, I still have one set of square Art Deco buttons which consist of a layer of cork sandwiched between two layers of blue Bakelite. They’re amazing – I can’t imagine anyone producing something like that today.
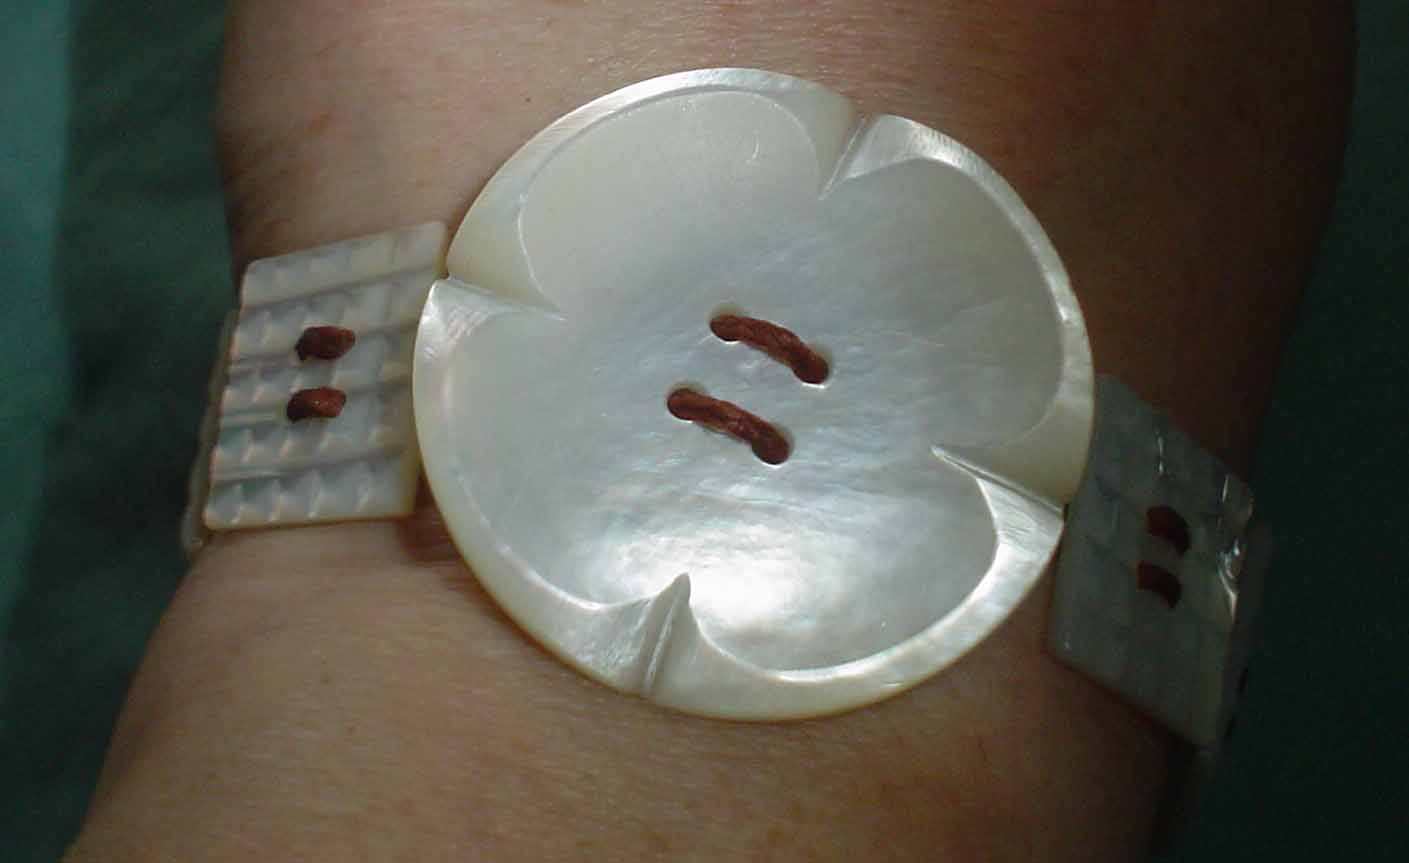
As time went on, my interest waned and I put the buttons in a drawer. The only time I ever used them was when I replaced the buttons on a new cardigan or shirt with ones from my collection. Mostly I used mother of pearl buttons, because I tended to have larger sets of those. In the last few years however, I’ve sold some of the buttons in my collection and started putting the rest to a different use. I had a set of really nice carved mother of pearl buttons, plus one really big one, and decided to turn them into a bracelet. The big one would go in the middle as a focal piece, with the smaller ones on either side plus another different shaped one at the end.
Click on any of these pics to make them bigger
In my stash of bits ‘n’ bobs, I was lucky to have a patchwork leather bag whose patches were sewn together with waxed cotton cord. I had no use for the bag, but I used the leather for several craft projects and saved the cord for a rainy day.
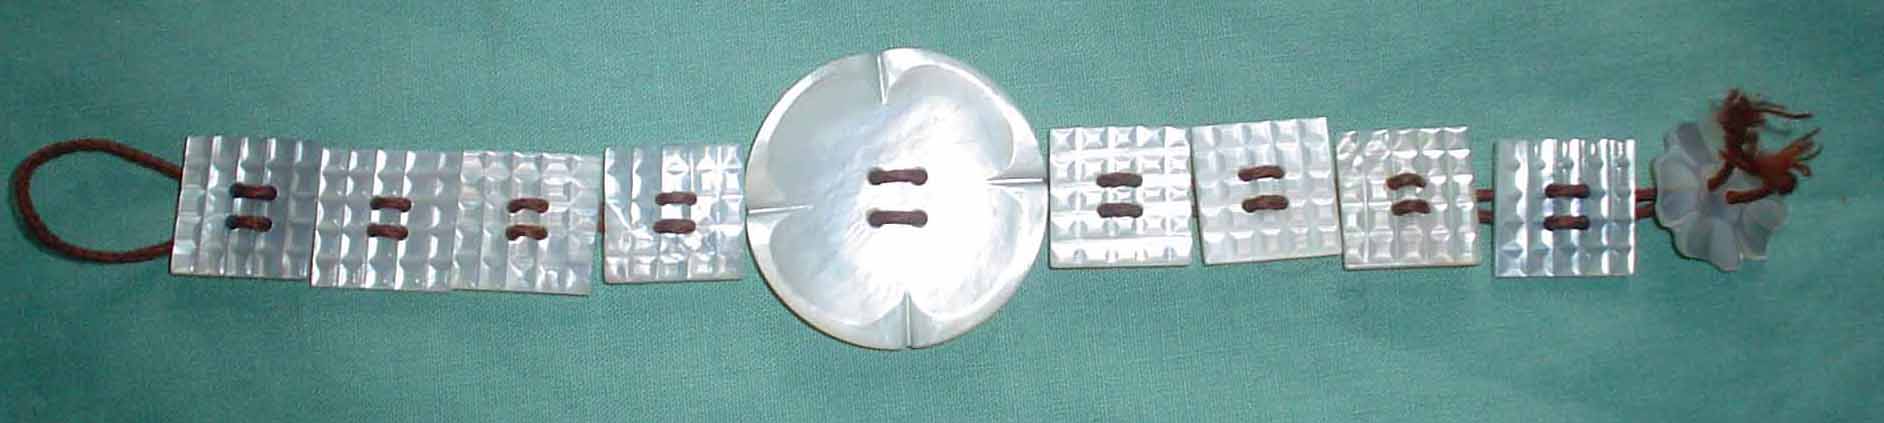
The cord was about 1 mm in diameter, just the right thickness to thread through the buttons I was using. Each of these buttons had four holes; I threaded the cord through one series of holes and then did a loop before coming back the other way. The thread was then secured by knotting it at each end. The bracelet I made could thus be easily fastened by hooking the loop over the last or second-to-last button. Laid in a line, the end result looks like the pic above right.
In case you’re wondering, the buttons I used were mother of pearl but I’ve also since done another bracelet in the same way, using wooden Victorian buttons. Four-hole buttons work best for making bracelets of this kind; you can use two-hole buttons but you will need to make your fastening loop by sewing one end of the cord in place rather than threading it back through the holes.
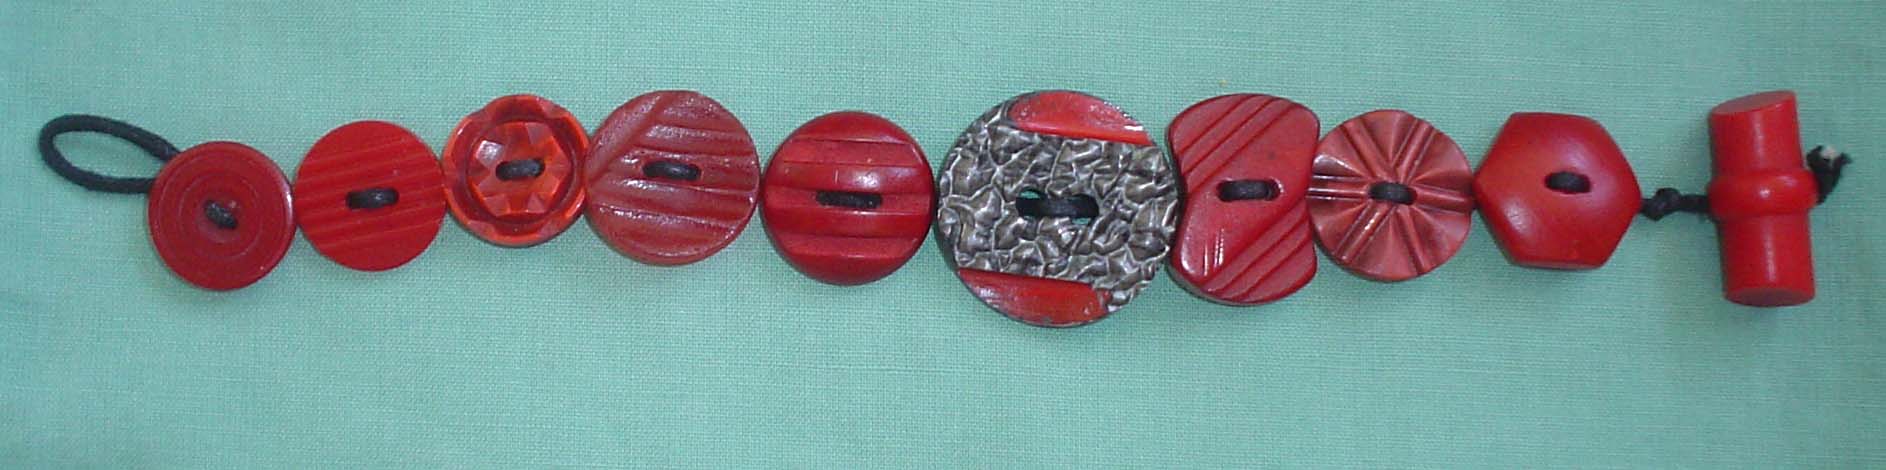
A bracelet made from different two-hole red buttons, with a toggle button at the end to act as a fastener
What happens when the holes on your buttons are too small for waxed cotton cord?
I recently encountered this problem when trying to make a bracelet out of some green vintage buttons. I tried using extra strong thread instead of cord, but the result was flimsy and untidy looking, so I sewed the buttons onto a backing made from green bias binding. To make the loop fastening, I used a narrow strip of the same bias binding which I folded lengthways and sewed up, before attaching it to the main part of the backing. You can also use hook-eye fasteners, whether new or rescued from old garments such as bras.

The green button bracelet
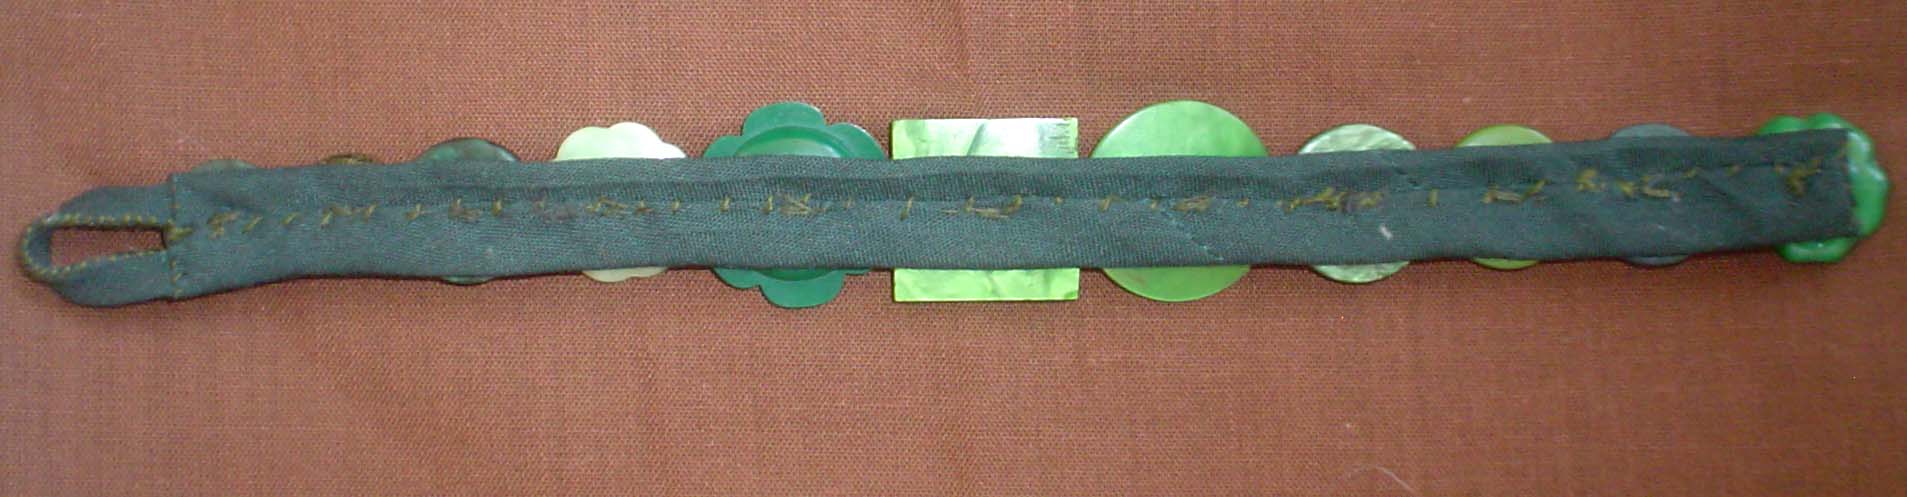
The same bracelet, viewed from the back
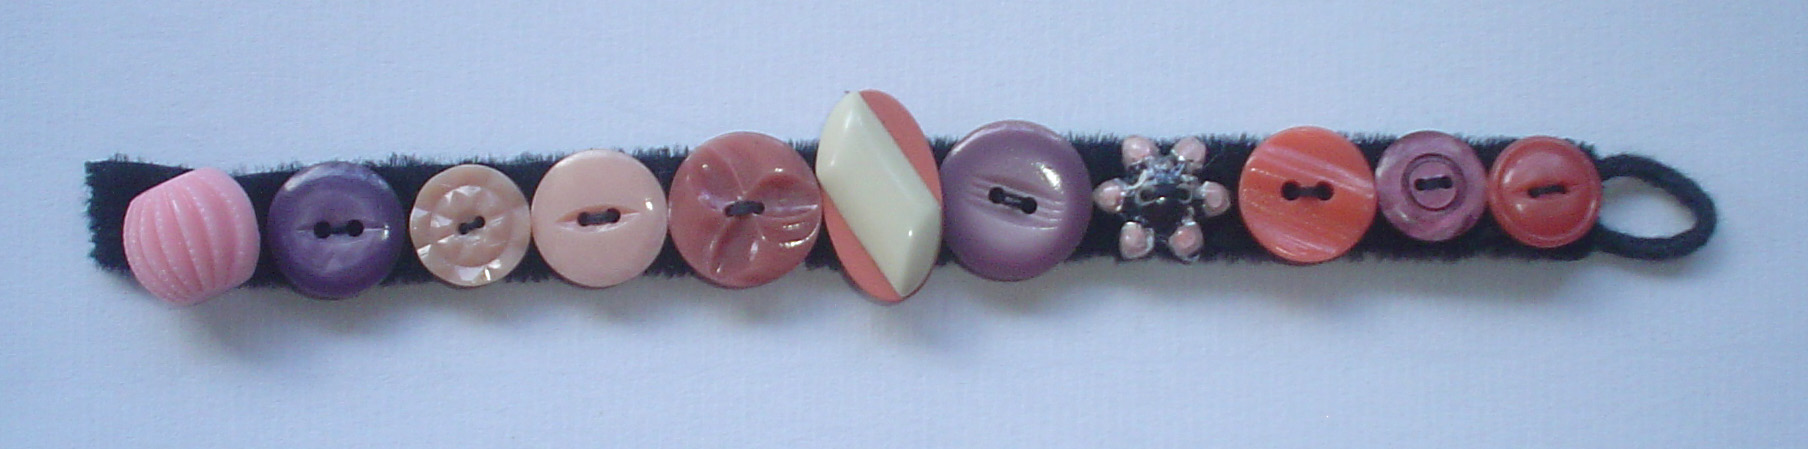
Another bracelet, this time in peach/lavender tones
Top tips
I’ve made a few of these bracelets now – here are some things that I’ve found to work for me:
1. Aim to get some interesting variations in colour, shape and style. For example if you’ve got some light and some dark buttons, try and alternate them so that you don’t get the dark ones at one end and the light ones at the other.
2. If you can, use a slightly bigger and more unusual button as the central “focal piece”. You can see an example of this in the peach and lavender bracelet, above, and also the mother of pearl button bracelet at the top of the page.
3. While we’re on the subject of size, try to group the smaller buttons at each end, graduating to bigger ones in the middle.
4. When sewing the buttons on a backing, use thread that’s slightly darker than the buttons themselves. I personally prefer to have a darker backing as well.
© Silver Snake 2009. This article formerly appeared on HubPages.